Stucco Repair in Kensington, Calgary: A Clean, Protected, Professional Finish
Kensington is one of those Calgary neighbourhoods where exteriors get noticed. Homes and multi-unit buildings sit close to sidewalks, patios, lanes, and shared spaces—meaning a stucco repair job can’t be “good enough.” It has to be clean, consistent, and done with real attention to detail.
This blog post breaks down a stucco repair project in Kensington, Calgary, using the exact job visuals you provided. No fluff, no made-up claims—just what’s visible and relevant: surface condition, protection/masking, controlled work setup, and a finished exterior that looks uniform and intentional.
Why stucco repairs in Kensington need to be done properly
Stucco is tough, but it’s also unforgiving when it’s repaired poorly.
A sloppy patch doesn’t just look bad—it can stand out from the street and make the entire wall look older than it is. In a neighbourhood like Kensington, where curb appeal matters, that mismatch becomes the “only thing people see.”
The most common reasons stucco repairs fail visually are:
Bad edge transitions (hard lines instead of blended boundaries)
Texture mismatch (repair area looks smoother, rougher, or “different grain”)
Uneven colour appearance (the patch looks darker/lighter)
No protection during work (overspray, staining, splatter on trim/windows/door frames)
What your photos show is the opposite of that last point: the work was set up to stay controlled.
What we can clearly see from the project photos
From your images, there are several details that tell the story of the job:
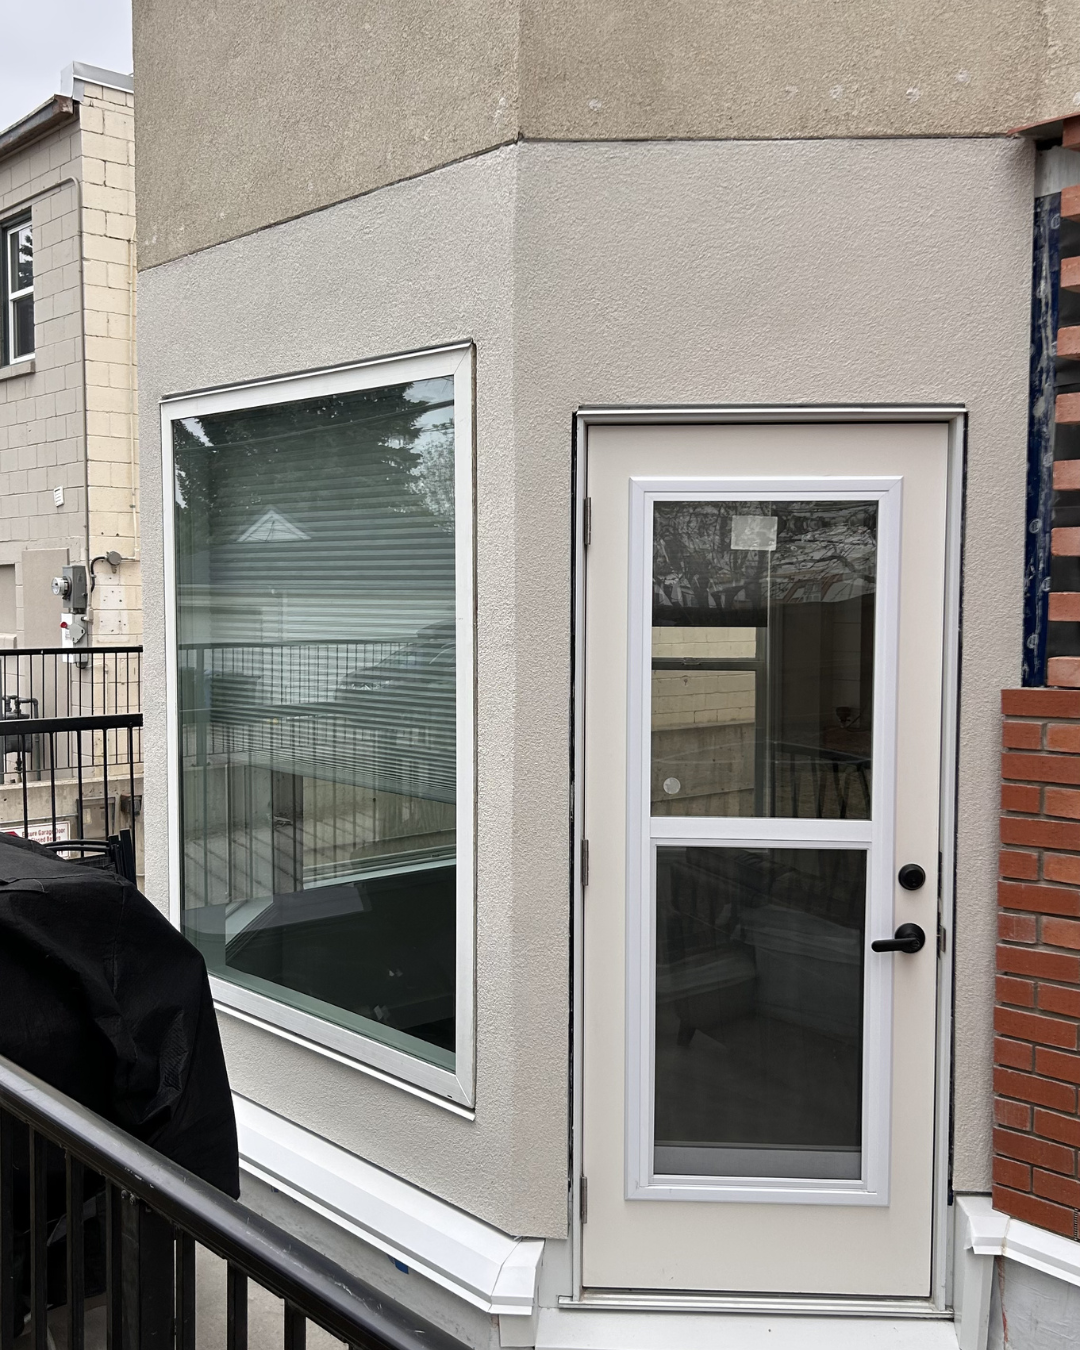
1) A finished stucco surface with uniform appearance
The “after” image shows a clean exterior wall section around a door and a large window. The stucco texture appears consistent across the visible wall areas, and the perimeter lines around openings look tidy.
2) Full masking and protection during the work phase
The work-stage photos show:
Windows fully covered with plastic
Red tape applied tightly around edges
Protection and containment visible in the work area
A ladder setup for access and controlled finishing
That masking matters because stucco work can easily leave marks where it shouldn’t—especially around window frames, door trim, and lower ledges.
3) A real-world repair environment (not a “perfect open wall”)
This wasn’t an empty wall in a backyard with unlimited access. The area includes:
A door
A large window
Railings close to the work zone
Tight working space with adjacent building elements
That type of environment is where quality control matters most, because there’s less room for error.
The repair approach (based on what’s visible)
Because you asked to use the attached pictures, this section stays grounded in what’s shown rather than inventing materials, timelines, or internal steps you didn’t provide.
Step 1: Prep and protection first (this is where good jobs start)
Before any repair surface work can be done cleanly, the site needs to be protected.
Your work photos show a clear example of proper prep:
Windows are fully wrapped in plastic
Tape lines are crisp and continuous
Plastic sheeting is pulled taut, not loose and flapping
Edges around openings are isolated so work stays within the repair zone
Place image here (work-stage photo showing masking and protection)
That setup is not cosmetic—it’s functional. It protects:
Window frames
Glass
Trim boards
Door edges
Lower ledges
Anything that would otherwise catch dust, splatter, or residue
It also makes the final result cleaner because the “finishing lines” around openings don’t get contaminated mid-process.
Step 2: Working clean around windows and doors
Doors and windows are where stucco repairs become obvious.
Even if the wall surface looks good, a sloppy edge near a frame will instantly break the look. Your photos show the work being done with those edges clearly in mind:
The door frame area is clean and intact
The window perimeter looks neat and aligned
Lower trim/ledge areas look protected and preserved
This matters because those edges create visual reference lines. If the texture or finish is inconsistent right next to a straight frame edge, the human eye catches it immediately.
Step 3: Maintaining a consistent finish across the visible wall plane
The finished image shows a wall where the stucco finish reads as one surface, not as “a patch.”
That’s the goal: when the repair is done, you shouldn’t be able to stand back and easily identify where it was.
Here’s what stands out in the finished photo:
Texture reads consistently across the wall surface
The overall look is uniform
The perimeter around openings looks clean
The wall has a cohesive, maintained appearance
Place image here (finished photo showing stucco around window and door)
What makes stucco repairs look “professional” versus “patched”
In practice, most people don’t judge stucco repairs by technical terms. They judge it by one thing:
Does it blend, or does it look like a patch?
A professional-looking stucco repair usually comes down to a handful of visible quality signals:
Clean transitions
You want the repair area to visually fade into the surrounding surface. If you can trace a hard rectangle or “repair footprint,” it looks unfinished.
Consistent texture
Texture mismatch is the most common giveaway. Even a small difference in grain size or pattern can make a repair look like it was applied later.
Controlled work zone
Masking, protection, and clean containment aren’t optional if the job includes windows, doors, rails, or finished trim.
Your job photos show controlled masking clearly, which is one of the biggest “green flags” of a careful repair.
Place image here (close work photo showing taped plastic and containment)
Why masking matters more than most clients realize
A lot of people think masking is just “extra work.” It isn’t.
It directly impacts:
The cleanliness of the finished edges
How much cleanup is required afterward
Whether frames and trim remain unmarked
Whether the repair looks crisp or messy
The red tape and plastic in your photos show a careful approach:
Tape lines run tight around the frame edges
Plastic coverage is complete, not partial
The protection is applied before the wall looks finished
That tells a simple truth about the workflow: the job was set up to avoid mistakes, not to fix them afterward.
What this Kensington stucco repair improves (visually and practically)
Even without adding claims you didn’t provide, we can clearly say what this kind of repair improves from what’s visible:
A better exterior presentation
The finished wall looks more uniform and maintained. That’s immediate curb appeal—especially important in a high-visibility area like Kensington.
Clean detailing around openings
Around doors and windows is where stucco work can look messy fast. The finished image shows a tidy look with clean boundaries.
A “finished” impression (not “construction in progress”)
Work-stage photos show protection and containment; the finished photo shows a clean exterior wall. That transition is exactly what clients want: a controlled process and a clean result.
Common situations where stucco repair is needed (relevant to this style of project)
While you didn’t list the exact cause of damage, projects like this are typically needed when:
Sections of stucco look worn or uneven
Past repairs don’t match
Areas around openings need attention
Exterior surfaces look inconsistent or aged
What matters most is not just that the repair gets done—but that it matches and looks intentional when finished.
Location note: Kensington, Calgary
Kensington is a mix of older and newer buildings, and exterior finishes are often part of what gives the neighbourhood its character. A stucco repair here isn’t just maintenance—it’s keeping the exterior looking cohesive and “kept.”
This post is specifically for:
Stucco Repair — Kensington, Calgary
Summary of what this project shows
Based strictly on the photos:
The work area was protected with full masking and plastic coverage
Window and door edges were handled carefully
The finished stucco surface looks uniform in the visible area
The overall result reads clean and maintained, not patched
If you want this turned into an SEO landing-page style post later (with service sections, FAQs, and conversion blocks), you’d need to provide the missing specifics (who did the work, scope details, exact problem, timeline, materials). For this request, the blog stays anchored to the visuals and the location you gave.
Kensington stucco repair — clean setup, clean finish.Before any stucco work touches the wall, the priority is protection: windows masked, edges taped tight, and the work zone kept controlled. The result is what you want on a high-visibility exterior—uniform texture, tidy lines, and a finished look that doesn’t scream “patch job.”
📍 Kensington, Calgary✅ Careful masking + clean detailing✅ Exterior stucco repair with a consistent finish
#StuccoRepair #KensingtonCalgary #CalgaryStucco #ExteriorRepair #CalgaryHomes #ExteriorRenovation #CalgaryContractor #HomeExterior
Bottom Cards (as requested)
ScopeX Media
Website: https://scopexmedia.com/
Email: admin@scopexmedia.com
Phone: 403-408-6389
Facebook: https://www.facebook.com/Scopexmediacom/
Instagram: https://www.instagram.com/scope_x_media/
High End Construction LTD
Website: https://highendconstruction.ca/
Phone: 587-576-0646
Facebook: https://www.facebook.com/p/High-End-Construction-61572173132670/
Instagram: https://www.instagram.com/highendconstructionltd/
LinkedIn: https://www.linkedin.com/company/high-end-construction-Itd
Meli’s Maid
Website: https://www.melismaid.com/
Email: info@melismaid.com
Phone: (587) 896-4003
Facebook: https://www.facebook.com/p/Melis-Maid-61572563818385/
Instagram: https://www.instagram.com/melis_maid/